The Lil Sew and Sew by Tivax manual is a comprehensive guide for setting up, operating, and maintaining your LSS-505 sewing machine. It includes troubleshooting tips, maintenance instructions, and is available in English and Spanish, along with a quick-start video, making it an invaluable resource for both beginners and experienced sewists.
1.1 Overview of the Lil Sew and Sew LSS-505 Sewing Machine
The Lil Sew and Sew LSS-505 is a compact, portable sewing machine designed for versatility and ease of use. It features dual-speed functionality, built-in stitches, and a user-friendly interface, making it ideal for both beginners and experienced sewists. Its lightweight design allows for easy transport, while its robust construction ensures reliable performance for various sewing projects.
1.2 Importance of the User Manual for Proper Operation
The user manual is essential for understanding the Lil Sew and Sew LSS-505’s features, setup, and operation. It provides detailed instructions for threading, tension adjustment, and troubleshooting, ensuring safe and effective use. The manual also covers maintenance tips and guides for utilizing the machine’s dual-speed functionality and built-in stitches efficiently.
Key Features of the Lil Sew and Sew LSS-505 Sewing Machine
The LSS-505 boasts built-in stitches, a compact and portable design, and dual-speed functionality, making it versatile for various sewing tasks and ideal for both beginners and experienced sewists.
2.1 Built-In Stitches and Customization Options
The LSS-505 offers a variety of built-in stitches, including straight and zigzag options, allowing for versatility in sewing projects. Users can customize stitch length and width to suit different fabrics and designs, ensuring precise control over their stitching. This feature enhances creativity and adaptability for both simple and complex sewing tasks.
2.2 Compact Design and Portability
The LSS-505 features a compact and lightweight design, making it easy to transport and store. Its small footprint allows it to fit seamlessly on any work surface, perfect for sewists with limited space. Portability ensures you can take your projects anywhere, whether working at home or on the go。
2.3 Dual-Speed Functionality for Versatility
The LSS-505 offers dual-speed functionality, allowing users to switch between high and low speeds. This feature enhances control and precision, making it ideal for sewing delicate fabrics, heavy materials, or intricate designs. The versatility ensures seamless transitions between various sewing tasks, catering to both beginners and experienced sewists.
Setting Up the Lil Sew and Sew LSS-505
Setting up the LSS-505 involves unpacking, inspecting the machine, and placing it on a stable surface. Power it on for initial testing to ensure proper functionality before use.
3.1 Unpacking and Initial Inspection
Begin by carefully unpacking the LSS-505 and inspecting for any damage or missing components. Ensure all accessories, like the power cord and presser feet, are included. Before use, check for any visible damage or defects to ensure optimal performance.
3.2 Placing the Machine on a Stable Work Surface
Position the Lil Sew and Sew LSS-505 on a flat, stable surface to ensure even operation. Ensure the area is level and away from direct sunlight or moisture. Keep the machine near a power source and clear of clutter for safe and efficient sewing.
3.3Powering On and Initial Testing
3.3 Powering On and Initial Testing
Plug in the Lil Sew and Sew LSS-505, ensuring the power switch is accessible. Turn it on and test operation without thread at medium speed to ensure smooth movement. Sew a scrap fabric to verify stitch quality. Refer to the manual for troubleshooting any initial issues.
Threading the Lil Sew and Sew LSS-505
The manual provides step-by-step guidance for threading the LSS-505. Ensure the presser foot is up, thread from front to back, and properly place the bobbin for smooth operation.
4.1 Thread Placement and Tension Adjustment
Proper thread placement involves positioning the thread between the tension discs with the presser foot up. Adjust the tension to ensure it’s neither too tight nor too loose, as this affects stitch quality. Correct tension ensures smooth stitching and prevents issues like thread breakage or uneven fabric movement during sewing.
4.2 Proper Needle Threading Technique
Thread the needle by inserting the thread from front to back, ensuring it aligns smoothly without tangling. Use the machine’s built-in guide to direct the thread correctly. Proper threading ensures consistent stitching and prevents issues during sewing. Refer to the quick-start video for a visual demonstration of this process.
4.3 Bobbin Thread Installation and Management
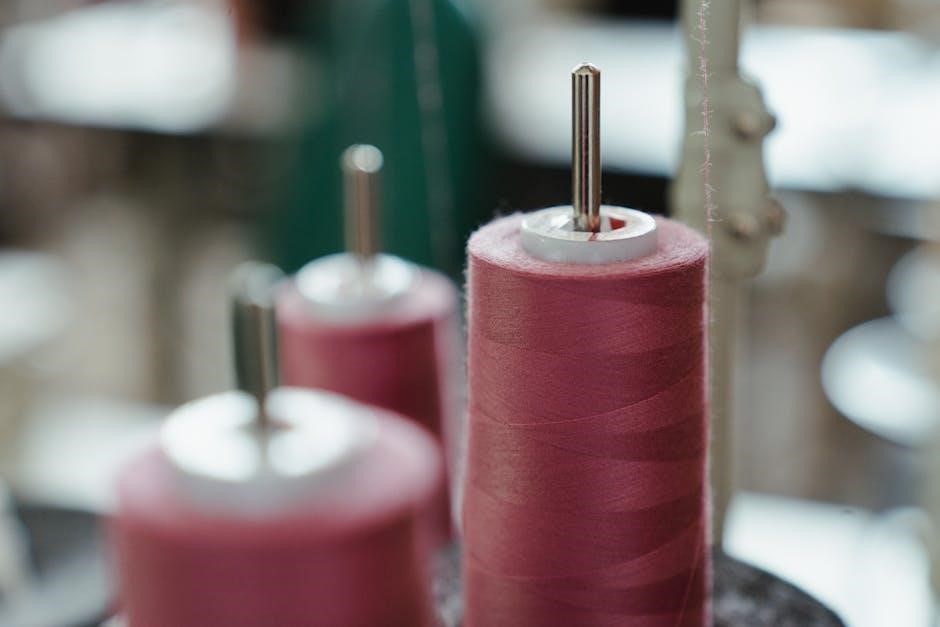
Unwind 4-5 inches of bobbin thread and place the bobbin in the case. Ensure the thread is correctly seated and not tangled. Properly managing the bobbin thread prevents stitching issues and ensures smooth operation. Always use the correct bobbin size and type recommended in the manual for optimal performance.
Basic Sewing Operations
Mastering basic sewing operations ensures smooth and efficient projects. Start with selecting the right stitch type for your fabric, then adjust stitch length and width as needed. Always begin with a few test stitches to ensure proper tension and alignment before sewing your actual project.
5.1 Selecting the Right Stitch Type
Selecting the right stitch type is crucial for achieving professional results. Choose from 12 built-in stitches, including straight, zigzag, and decorative options. Use straight stitches for heavy fabrics and zigzag for stretchy materials. Always test your selected stitch on scrap fabric to ensure proper tension and alignment before starting your project.
5.2 Adjusting Stitch Length and Width
Adjust stitch length and width using the control dials. The length dial sets the stitch size, while the width dial adjusts the zigzag stitch span. Turn the dials to customize settings for different fabrics and projects. Test settings on scrap fabric to ensure optimal results before sewing your final piece.
5.3 Starting and Stopping the Sewing Process
Press the power button to start the machine. Use the foot pedal for control. Before sewing, ensure the presser foot is down and the needle is in the correct position. To stop, release the foot pedal and turn off the machine using the power button for safe operation.

Advanced Features and Techniques
The Lil Sew and Sew LSS-505 offers advanced features like free-arm sewing, reverse stitching, and adjustable tension, allowing for intricate projects and precise control over fabric handling.
6.1 Using the Free-Arm Option for Complex Projects
The free-arm option on the Lil Sew and Sew LSS-505 allows for easy maneuvering of complex or cylindrical fabrics, such as sleeves or pant legs, providing greater control and precision for intricate sewing tasks. This feature is particularly useful for creating professional-looking garments and home decor items with ease and accuracy.
6.2 Sewing Reverse Stitches for Reinforcement
Reverse stitches on the Lil Sew and Sew LSS-505 are essential for reinforcing seams, especially at the beginning and end of stitching. Use the reverse button to create strong, secure stitches that prevent unraveling. This feature is particularly useful for heavy-duty fabrics or projects requiring extra durability, ensuring professional-quality results every time.
6.3 Adjusting the Tension for Different Fabrics
Adjusting the tension on the Lil Sew and Sew LSS-505 is crucial for achieving even stitches on various fabrics. Start by ensuring the presser foot is up, allowing the thread to pass through the tension discs. For heavier fabrics like denim, increase the top thread tension slightly. For lighter fabrics, such as silk, reduce the tension to prevent puckering. Always test the stitches on scrap fabric before starting your project to ensure the tension is properly set for the specific material. This step ensures professional-quality results and prevents common sewing issues.
Troubleshooting Common Issues
Troubleshooting common issues with the Lil Sew and Sew LSS-505 involves diagnosing problems like thread breakage or uneven stitches. Refer to the manual for step-by-step solutions to ensure smooth operation and resolve any sewing challenges effectively.
7.1 Resolving Thread Breakage Problems
Thread breakage issues can be resolved by checking the tension discs and ensuring the thread is properly seated. Gently pull the thread to verify tension and re-thread if necessary. If the problem persists, consult the manual for additional troubleshooting steps to maintain smooth sewing operations.
- Ensure the thread path is correct and free from obstructions.
- Adjust the tension settings as recommended in the manual.
- Check for loose threads or knots that may cause breakage.
7.2 Fixing Jammed or Uneven Stitches
Jammed or uneven stitches can be resolved by checking thread tension, ensuring proper threading, and clearing debris. Adjust the tension discs, re-thread the machine, and clean the bobbin area. If issues persist, refer to the manual for specific guidance to restore smooth stitching performance.
- Ensure the thread is not tangled or knotted.
- Check the bobbin for correct installation.
- Verify the presser foot is in the correct position.
7.3 Resetting the Machine to Factory Settings
To reset the Lil Sew and Sew LSS-505 to factory settings, turn off the machine, press and hold the reset button for 5 seconds, then release. This restores default settings, ensuring optimal performance. Refer to the manual for specific reset procedures and post-reset calibration steps.
- Turn off the machine completely.
- Locate the reset button (refer to manual).
- Press and hold for 5 seconds.
- Release and power on to test.
Maintenance and Cleaning
Regular maintenance ensures the Lil Sew and Sew LSS-505 operates smoothly. Clean the bobbin area, oil moving parts, and check for loose screws. This extends machine lifespan.
8.1 Regular Cleaning of the Bobbin Area
Regularly clean the bobbin area to remove lint and debris. Use a small brush to gently sweep away loose fibers. Ensure the area is clear to maintain smooth thread flow and prevent stitching issues. This simple step helps keep your machine running efficiently and reliably over time.
8.2 Oiling the Machine for Smooth Operation
Regularly oil the machine to ensure smooth operation. Apply a few drops of high-quality sewing machine oil to the metal parts, such as the shuttle hook and gears. This prevents friction and overheating, keeping your Lil Sew and Sew running efficiently. Oil after cleaning or every few months of use for optimal performance.
8.3 Checking for Loose Screws or Parts
Regularly inspect the machine for loose screws or parts, especially after heavy use. Tighten any loose components, such as the bobbin case or presser foot, to ensure proper function. Use the Allen wrench provided in the accessory kit. If unsure, consult the manual or contact Tivax customer support for assistance.
Safety Guidelines
Always ensure loose clothing is tied back and keep long hair tied up. Avoid wearing jewelry that could get caught in moving parts. Keep children and pets away while operating the machine. Never touch sharp objects like needles or presser feet with bare hands. Ensure the work area is clear of clutter and well-lit. Avoid sewing over pins to prevent accidents. Unplug the machine when not in use or during maintenance. Regularly inspect the machine for damage or wear and tear. Follow all safety precautions outlined in the manual to ensure safe and efficient operation.
9.1 Avoiding Accidental Start-Ups
Always ensure the presser foot is in the up position when not sewing. Turn off the power switch and unplug the machine during maintenance or when not in use. This prevents accidental start-ups and ensures safety.
9.2 Keeping Children Away from the Machine
Keep children away from the machine to prevent accidents. Never let them play with it or touch sharp parts. Store the machine in a secure location when not in use and unplug it. Teach children the dangers and supervise them near the machine.
9.3 Proper Handling of Sharp Objects
Always handle needles, scissors, and other sharp objects with care. Use a needle threader to avoid pricking fingers and store sharps in a protective case. Keep them out of children’s reach to ensure safety while sewing or maintaining the machine.

Accessories and Replacement Parts
Explore compatible needles, specialized presser feet, and genuine replacement parts designed for the Lil Sew and Sew LSS-505. These accessories enhance functionality and ensure optimal performance.
10.1 Compatible Needles and Bobbins
Using the correct needles and bobbins ensures optimal performance for your Lil Sew and Sew LSS-505. Choose from sharp, heavy-duty, or universal needles for versatility. Always use genuine Tivax parts for compatibility. Properly install and align the bobbin to maintain smooth stitching and prevent thread issues.
10.2 Additional Presser Feet for Specialized Tasks
Enhance your sewing experience with specialized presser feet for tasks like zippers, buttonholes, or blind hems. These attachments improve precision and versatility, ensuring professional results. Always use genuine Tivax parts for compatibility and optimal performance with your Lil Sew and Sew LSS-505 sewing machine.
10.3 Where to Purchase Genuine Parts
Genuine parts for the Lil Sew and Sew LSS-505 can be purchased directly from Tivax or authorized retailers. Online platforms like Amazon and eBay also offer compatible accessories. Ensure authenticity by buying from trusted sources to maintain your machine’s performance and warranty.
Online Resources and Support
Access official resources like the downloadable PDF manual, tutorial videos, and customer service contact information for the Lil Sew and Sew LSS-505 on Tivax’s website and authorized platforms.
11.1 Downloading the Official User Manual
The official Lil Sew and Sew LSS-505 user manual can be downloaded from Tivax’s website in both English and Spanish. It covers setup, operation, and troubleshooting, ensuring users have all the necessary guidance for optimal use of their sewing machine.
11.2 Watching Tutorial Videos for Better Understanding
Tivax offers tutorial videos, including a quick-start guide, to help users master the Lil Sew and Sew LSS-505. These videos provide visual instructions on machine setup, operation, and troubleshooting, making it easier for users to understand and utilize the machine’s features effectively for their sewing projects.
11.3 Contacting Tivax Customer Service
Tivax Customer Service provides support for inquiries, troubleshooting, and purchasing genuine parts. Contact them through their official website or support channels for assistance with the Lil Sew and Sew LSS-505 sewing machine. This ensures users receive reliable help and maintain their machine effectively for optimal performance.

User Reviews and Feedback
Users praise the Lil Sew and Sew LSS-505 for its portability and ease of use, while others highlight areas for improvement. Experienced sewists share tips for optimal performance and troubleshooting common issues, helping newcomers enhance their sewing experience with this versatile machine.
12.1 Common Praise for the LSS-505
The LSS-505 is frequently praised for its portability, ease of use, and versatility. Users appreciate its compact design, dual-speed functionality, and intuitive controls, making it ideal for both beginners and experienced sewists. Many highlight its ability to handle various fabrics and projects with ease, earning it a reputation as a reliable and creative tool.
12.2 Areas for Improvement as Per Users
Some users note that the LSS-505 could benefit from a more durable build, as the plastic components feel flimsy. Others mention occasional thread breakage and jammed stitches, suggesting room for improvement in tension control. A few users also wish for more stitch options and better illumination for detailed work.